How to Create, Edit, and Delete Crews (Crews)
Last updated July 6, 2026 · Admins and office staff
A crew is a field team you assign work to. Crews are the backbone of scheduling: every appointment and route is assigned to a crew, and a crew’s settings decide how its work is scheduled (time-based calendar vs. route-style stops) and where its routes start and finish. This article covers creating, editing, and deleting crews. To add or remove people on a crew, see Crew Members.
Before you start
- An operator account with access to the Crews menu.
- Decide the crew’s scheduling style before you create it: Time Based = Yes (hour-by-hour appointments) or No (date-only route visits). This is the single most important choice — it determines which calendar the crew’s work appears on. See Scheduling Overview.
- If the crew runs routes, have its depot address (the yard/shop it leaves from and returns to) handy — it’s used as the start/finish point for route optimization.
The Crews list
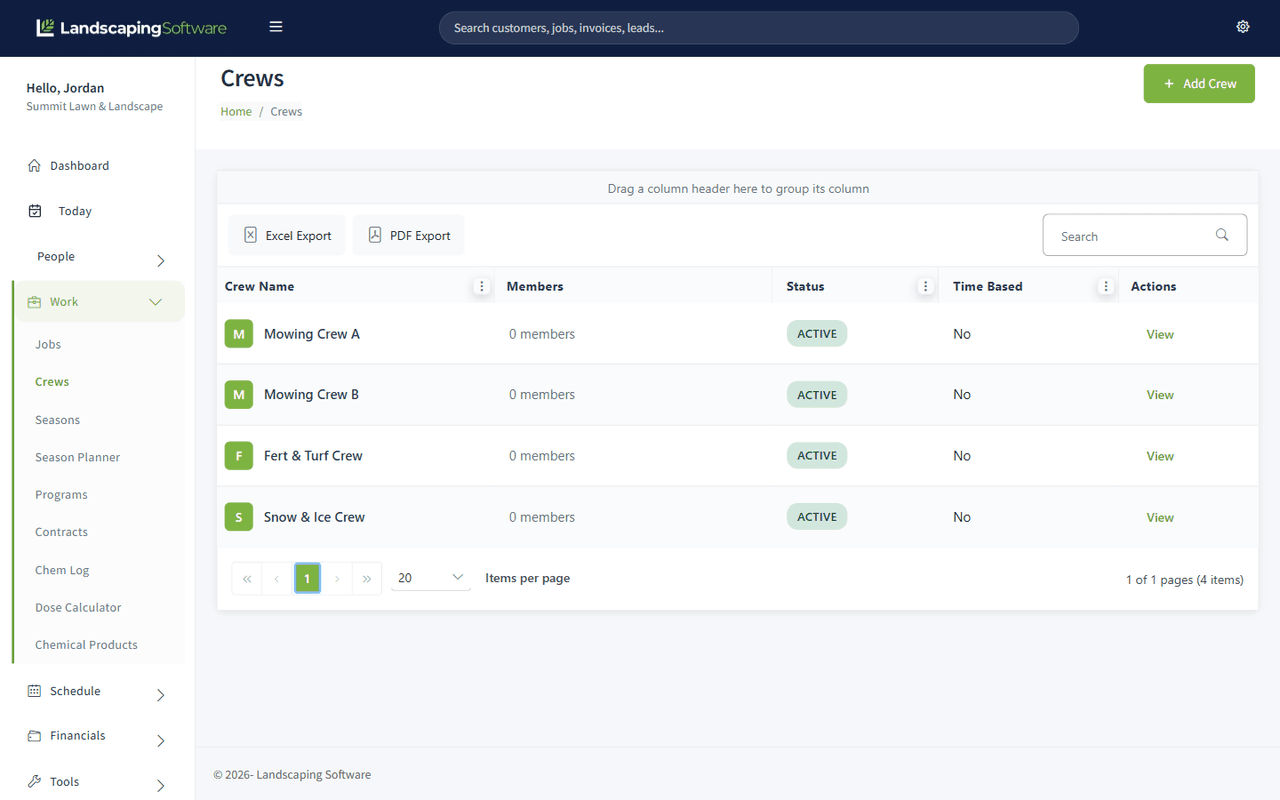
Go to Crews to see every crew in a grid: Crew Name, Members (a live count), Status (Active/Inactive badge), and Time Based (Yes/No). Click any row — or its View button — to open that crew’s summary page. Use the search box and the Excel/PDF exports in the toolbar as needed.
Create a crew
- On the Crews list, click Add Crew.
- Fill in the form:
| Field | Required | Notes |
|---|---|---|
| Name | Yes | The only required field. The crew’s display name everywhere in scheduling. |
| Time Based | No | Yes = time-based calendar (appointments with start/end times). No = route-style (date-only visits, managed in Route Management). Leave blank to decide later, but set it before you schedule work. |
| Description | No | Optional free-text note. |
| Active Crew | No | Toggle, on by default. Only active crews appear in scheduling and assignment. |
| Address / Address 2 / City / State / Zip | No | The crew’s depot — used as the start/finish point for route optimization. Strongly recommended for route-style crews. |
- Click Create Crew (or Cancel / Back to leave without saving).
What happens next
After you save, you land on the new crew’s Crew Summary page with a “Crew created successfully!” confirmation. From there you can assign crew members and refine the details. The crew immediately becomes available in the scheduler (if Active) — as a card on the Daily Dispatch board and in crew dropdowns that match its Time Based type.
Edit a crew
- Open the crew from the Crews list to reach Crew Summary.
- In the Crew Details card, change any field: Name, Time Based?, Description, Status (the toggle updates the Active/Inactive label live), and the Depot Address fields.
- Click Update Crew to save.
Notes:
- Depot warning: if the depot Address, City, State, or Zip is incomplete, the page shows an alert that “Route Management will not be able to plot start/finish stops until you add Address, City, State, and Zip.” Fill all four to clear it.
- Changing Time Based moves the crew between the time-based calendar and route-style scheduling — do it deliberately, because existing work follows the crew’s new type.
- Setting a crew Inactive removes it from the dispatch board and crew dropdowns without deleting it or its history — the right choice for a crew you’ve disbanded but want to keep on record.
Delete a crew
- On Crew Summary, click Delete Crew.
- Confirm the “Are you sure you want to delete this crew?” prompt.
Deletion is blocked until the crew is clear of dependencies. You’ll be sent back with an error if:
- The crew still has members — “Please remove any Crew Members before deleting this Crew.” Remove every member first (see Crew Members).
- The crew still has scheduled jobs — reassign or unschedule that crew’s jobs first.
Once it has no members and no scheduled jobs, deletion succeeds and you return to the Crews list with “Crew has been deleted successfully!”. Prefer setting a crew Inactive over deleting if you might need its records later.
Tips & best practices
- Set Time Based deliberately at creation. It’s the field that decides the crew’s entire scheduling experience.
- Always add a depot address for route crews. Without it, route optimization falls back to a rougher ordering and the Route Management page flags the crew as unconfigured.
- Use Inactive instead of Delete for seasonal or disbanded crews — deletion requires stripping members and unscheduling jobs, and it’s permanent.
- Keep names distinct (e.g. “Mowing – North”, “Install Crew A”) — they’re what you pick from on every scheduling screen.
Troubleshooting
- “Please remove any Crew Members before deleting this Crew.” — the crew still has assigned members. Remove them all, then delete. See Crew Members.
- Delete is blocked citing scheduled jobs — the crew is still assigned to jobs on the schedule. Reassign or unschedule those, then delete.
- My new crew doesn’t appear in the scheduler — it’s Inactive, or you’re looking at the wrong Crew Type filter (time-based vs non-time-based). Check the crew’s Status and Time Based settings.
- The depot warning won’t go away — all four of Address, City, State, and Zip must be filled; a missing one keeps the alert up.
- “An error occurred while retrieving crews” — the list couldn’t load. Refresh, and contact support if it persists.
Related articles
- Crew Members — assign and remove people on a crew
- Scheduling Overview — time-based vs route-style crews
- Route Management — where the depot address is used
- Calendar Scheduling — assigning appointments to crews